The classic inwardly curled bob style has been a popular style for several years. Many people use an iron or straightening iron for styling. But actually, it is easier and more beautiful to blow-dry your hair with a brush.
A single iron may seem easier than the two-fisted approach of using a hair dryer and a brush. But once you get the hang of it, brush blow-drying has many advantages.
contents
Brush blow-drying is “quick, fluffy, and damage-free
Choose a thick brush.
First, hand blow-dry the hair in a straight line.
No need for tedious blocking!
Insert the brush inside the hair and pull.
Finally, blow-dry hair with cold air to make it shiny.
Brush blow-drying is “short, fluffy, and damage-free.”
There are three main advantages of brush blow-drying.
- Shorter time
With an iron, you have to wait for it to heat up, but with a brush blow-dryer, you don’t have to wait at all. You can start blow-drying right away, even on busy mornings.
Soft and airy finish
Styling with a hair iron produces shine, but tends to smash the top of the hair. Blowing with a brush creates a fluffy, airy top finish.
- Less damage to hair
The temperature of a hair iron can reach 180°C or higher, but the heat from a hair dryer is at most 100-120°C. Because the temperature is lower, the hair is less likely to be damaged. Because the temperature is lower, damage to the hair is also lessened. It is a gentle styling method for permed or straightened hair.
Choose a thicker brush.
The first step in starting brush blowdrying is to choose a brush. Use a thick roll brush. A roll brush is a round brush with a 360 degree brush. The thickness should be about 35 mm, which is easy to use.
At first glance, you may feel that it is quite thick. Hair stylists often use thicker brushes, don’t they? If the brush is too thin, it tends to make the line look chunky and unnatural, so a thicker brush will give a more natural finish.
Now, let’s get into the specific process.
First, hand blow-dry the hair in a straight line.
The first important step is to blow dry your hair lightly by hand before using a brush. Unless you have just showered, your hair will have some waviness and kinks, so dampen your hair thoroughly from the roots and dry it roughly with the palm of your hand.
At this point, dry hair on the side toward the opposite side and hair in the back toward the front. Dry hair in the manner of a cat’s paw, grasping the hair strands from the inside by placing the hair between your fingers and twisting your wrist to create an inward curling shape. Blow-dry hair carefully, especially on the right side, as it tends to spring forward.
This will make the top of the hair stand up softly and remove any odd curls, making it easier for the hair ends to naturally curl inward. Moisturizing only the ends of your hair will not remove the kinks, so be sure to start from the roots.
This completes the preparation for a bob that does not spring. Next, we will create a beautiful inner curl.
No messy blocking needed!
Blocking hair is a tedious part of blow-drying. However, if your hair is about the length of a bob, you can simply divide it into two sections, one at the front and one at the back, without blocking each section in detail. Take about half of the hair from the surface and pin it at the top.
As for the amount of hair to blow-dry at a time, it is recommended that the sides be divided into front, middle, and back one-third at a time, and the back be divided into left and right one-half at a time.
Brush is placed inside the hair and pulled
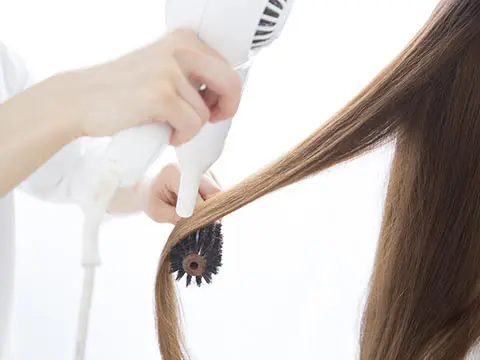
Start blow-drying the hair at the back, not at the surface. Take a bunch of hair at the back and tuck the brush inside the hair. If you have difficulty doing this with one hand, put the hair dryer down and use both hands. The trick is to get the brush firmly into the roots. After inserting the hair into the roots, pull the hair downwards by clamping it between the tip of the hair dryer and the brush.
Finally, turn your wrist inward to create shiny curls on the surface and curls at the ends.
Finally, cool air is used to increase luster.
Blow-dry the other bunches in the same way, and finally set the hair dryer to cold air to loosen the entire hair. At this point, direct the air from the top toward the ends of the hair. This will tighten the cuticles and make them shinier. This completes the blow-drying process. Finish with a spray or wax.
How was it? Try our easy and gentle brush blow-dry.
